DIY Guide To Pouring With Resin Molds
Check These Out!
At Rocket Resin Molds we are dedicated to bringing you the best DIY guide to pouring resin with your molds.
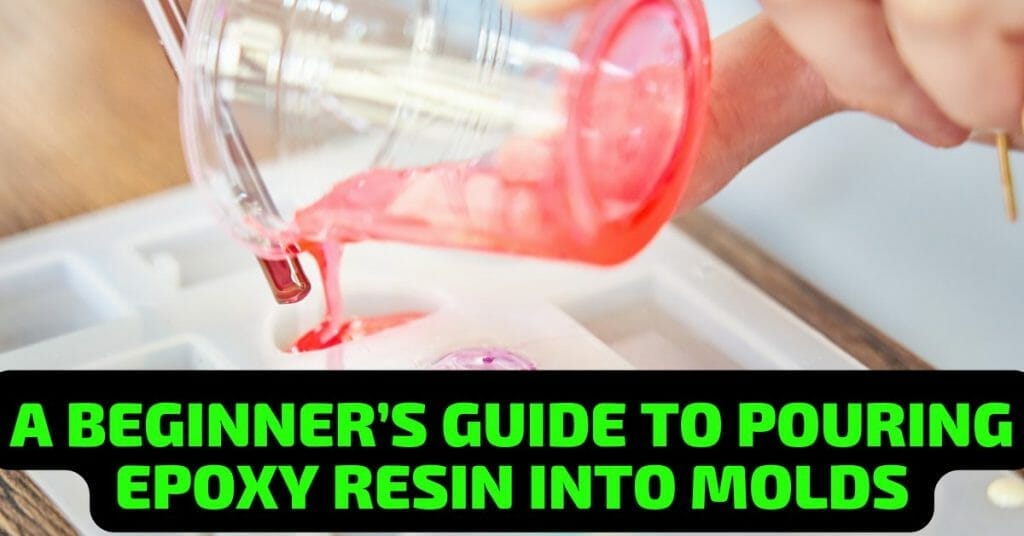
How to pour resin in a mold
1. Pour a small amount of resin into the mold and stir it around with a popsicle stick or other stirring tool.
2. Add more resin to the mold, and continue stirring until the resin is fully mixed in.
3. Pour the resin out of the mold and allow it to dry.
When it comes to resin, there are a few things you need to know before getting started. The first is that you will need a silicone mold and hardener. The second is that the process of pouring resin into the mold in a circular fashion is tricky to estimate.
To help with this, here are some guidelines for how much resin to use for your project:
– For basic projects, you will only need about 1 ounce of resin.
– Make sure to protect the molds with a dust cover and keep them from being damaged when they are removed.
– Place the two halves of the mold together, matching up the keys that were made into the mold.
– Secure with one or more rubber bands, being sure not to over-tighten them.
– Slowly pour resin in a 1:1 ratio mix into sprue placed on the side with air holes face up for specific color mixing if needed.
– Lightly tap the mold to help push bubbles out of the resin.
After letting the resin harden for a period of time determined by the manufacturer, remove rubber bands and slowly separate the halves–being careful not to break cast part when removing sprue and runner from mold; if segments did not fill completely with plastic, then either air was trapped, or it was squeezed too tight.
Step 1: Prepare the molds and the working area.
The first step is to make sure that the workspace is covered in wax paper, and the molds are properly washed. It is also important to have all of the necessary tools and materials ready before starting the project.
In order for the resin and chemicals to mix thoroughly, it is necessary to use a ratio of silicon to the resin of 1:1. Stir for 3-5 minutes before scraping sides with a wooden stick.
Once mixed, silicone can be poured into a mold using a funnel to ensure that the resin and chemicals are mixed thoroughly.
A glue gun is then used to seal the back of the case with silicon tape, which ensures that any chemical leaks don’t escape.
If this step is not done properly, then the mold won’t fit together properly and will have a difficult time holding shape. This can be accomplished with a heat gun or a hairdryer, depending on what type of resin you are using and how thick it is.
Step 2: Start mixing.
Now that you have all of your materials ready, it’s time to start mixing. Be sure to read all the instructions carefully, as the mixing time will vary from brand to brand.
In a disposable cup or another container, combine equal parts resin and hardener. Stir slowly for at least 3-5 minutes while measuring the weight of parts A and B to ensure proper mixing. This is important, as improper mixing can result in an imperfect product.
If you want to add color, first incorporate pigments into the mixture, then stir until dissolved (the color won’t be as strong if you don’t).
Pour the silicone evenly and thinly into the mold. Make sure to scrape the sides with a wooden stick to prevent bubbles from forming in the resin, which can cause your finished product to have imperfections.
Wait 12 hours for the silicon to harden. It may take a few more hours, but when it reaches the surface, it should be hardened.
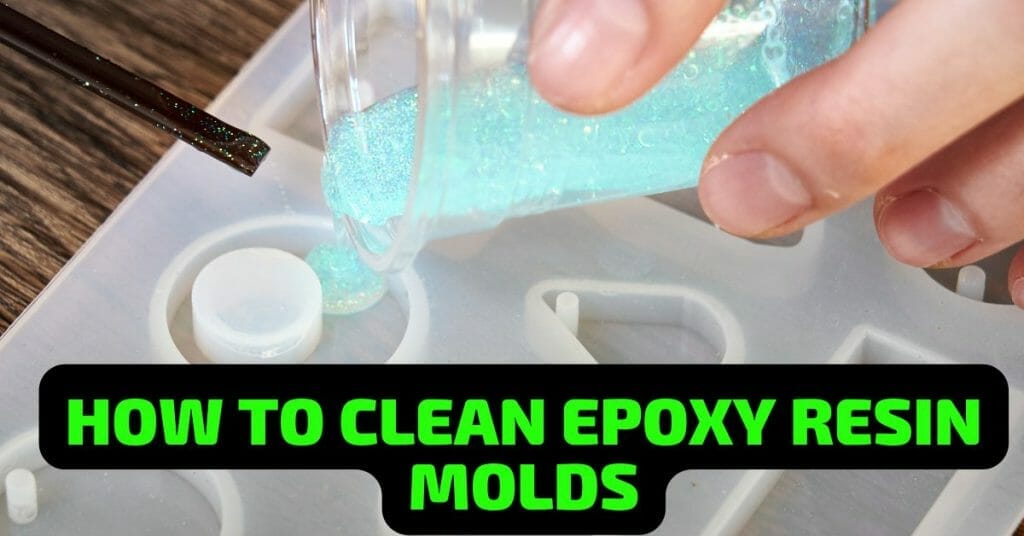
Step 3: Pour the composition into the molds.
When pouring resin into a mold, you should use a wooden stick to scrape it in rather than your finger. This will help avoid getting the resin on your skin and keep it from sticking to the sides of the mold.
Epoxy resin casting is easier to use and more common for beginners. It can be used with both metal casts and silicone rubber molds, which are both available online or at craft stores. Casting resins are excellent for filling deeper than 1/8 inch.
For projects that need 3 ounces or less, use the Resin Obsession super clear resin. This resin is perfect for smaller projects and has a shorter curing time than other resins.
Casting resins can be used for epoxy river tables and deep-pour epoxy resin projects with up to 2 inches of depth. To do this, add the desired amount of resin to your mixing container and then slowly add water until the mixture reaches a peanut butter consistency. The resin is poured as normal, but the mold is filled with water. When the water is added to the resin mixture, it creates a color change from clear to opaque or vice versa. Color changes can also be created by adding colored pigment (such as food coloring) when pouring the resin into a mold and moving at different speeds of pouring during different times of mixing.
When coloring resin, you should use colors designed for resin. These pigments are specifically made to not fade or change color over time. You can find them in a variety of colors, including metallic and pearlescent.
You can make resin keychains from any mold – resin, metal casts, or silicone rubber molds. Pour the colored epoxy into a mold, then add hardware to the top of each piece. This will give your keychain a more finished look.
The book is published for less than the cost of a resin kit. The author shares the essential details he has learned over fifteen years of creating with resin – everything from choosing the right molds to adding finishing touches.
Step 4. Pop-out your works of art.
After the resin has fully hardened (which should take about 12 hours), it’s time to remove your works of art from the molds. Gently peel away the mold, making sure to release any air bubbles that may have formed. If you’re having trouble getting the mold off, try using a bit of heat (from a hairdryer, for example).
Once your pieces are free of the mold, give them a good cleaning with some soap and water. You may also want to give them light sanding to remove any imperfections.
Step 5. Wash your mold.
After each use, molds must be cleaned with water and soap. This removes any residue or particles that may have been left behind. Molds should also be stored away from heat and sunlight.
If the mold is sticky, give it time to dry before continuing with step 5. Step 4: Start slowly pouring the silicone into the mold. When using resin-based clay materials in your molds, it is important to follow all directions for each step of the process. If you mix too much resin into the mold, it will likely leak out during curing, which could cause a ruined product or an unsightly mess in your workspace.
How to remove air bubbles.
There are a few ways to remove air bubbles from your product:
– Use a needle to prick the bubble and release the air
– Use a toothpick to pop the bubble
– Use a hairdryer to heat the bubble and release the air
There are a few ways to remove air bubbles from your epoxy resin before it cures. One way is to use a hairdryer to blow on the surface of the resin until the bubbles disappear. Another way is to use a hot air gun or torch directly above the bubble. You can also try pouring the thickest liquid last into your mixing cup, and use a figure-eight motion in order to avoid air bubbles with fast movements while mixing resin and concrete. Bobbing up and down can incorporate more air into the mixture. Finally, with a blow torch or heat gun, you can pop any bubbles that rise to the surface of the resin. Just wait a few minutes before popping them so that they don’t turn into carbon dioxide gas pockets.
Types of resin molds
There are three types of resin molds: dimensional, silicone, and plastic. Dimensional molds are usually created for 3D objects, and they can be made from a variety of materials like metal, wood, or plaster. Silicone molds can be reused, but they might be a bit expensive and require more care than plastic ones. They’re also very flexible, so they’re great for detailed shapes. Plastic molds are low-priced and easy to work with because they are flexible. However, they can only be used once since they’re not as durable as silicone or metal ones.
Home molds transform almost anything from home into a resin mold, including ice cube trays, chocolate boxes, or glass jars to plastic lunch containers and cookie cutters. If you’re looking for an easy way to make your own resin molds without spending too much money, then this is the option for you!
How to make resin molds at home:
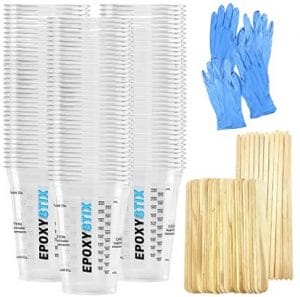
Making resin molds at home is a great way to create custom-made molds for a variety of different purposes. In order to make a resin mold at home, you will need:
– A resin kit
– A molding container
– A stirring stick
– A measuring cup
– A disposable container
– Safety goggles
– A respirator
– Gloves
Making resin molds at home is a fun and easy project that can be completed with a few simple materials. You will need to measure the resins to ensure they are of the correct consistency, and you should also make sure you have all of the necessary materials before beginning.
Once you have gathered your supplies, it’s time to get started! Begin by mixing the resin according to the instructions provided by the manufacturer. Then, use a spoon or spatula to fill up your mold with the resin. Make sure that you spread it out evenly, and then allow it to cure for the recommended amount of time.
When your resin has finished curing, it’s time to remove it from the mold. Gently pry open the mold using a knife or other sharp object, and then carefully remove your casting. If there are any imperfections, you can always fix them with some sandpaper or other crafting tools.
Molds made with liquid silicone
There are two methods for making a DIY mold out of silicone.
The first method requires mixing equal parts A and B of the kit in a plastic cup for five minutes, then placing your object in the mold with some space to cover it with the mixture. Once cured, carefully remove your item from the mold and use it as-is or cast resin into it yourself!
A release is a material that prevents the part from sticking to the mold. Silicone chalks are used to create molds.
It’s time to remove the item you’ve coated with resin when it begins to harden.
Let it cure for about one or two hours after the resin no longer feels tacky to the touch.
Molds made with silicone putty
There are two types of silicone putty: one that cures with a hardener, and one that doesn’t. The first type is combined with the second in a 1:1 ratio, which creates a mold.
To obtain total hardness, let it cure for 24 hours.
Casting resin molds can be purchased or made by hand.
There are many types of mold options you can choose from to suit your project needs.
A glass option is a beautiful option that adds extra protection to your project.
This tutorial will show you how to make resin molds at home.
You’ll need a razor blade and x-acto knife for the molding process.
While most molds are made in a similar way, it’s important to follow the instructions on your mold putty box in order to properly use the product.
Types of resins
There are three types of resins: epoxy, polyester, and silicone. Epoxy resin is perfect for people looking to pour paint, cast jewelry, and make coasters. Polyester resin can be used for industrial applications or by experienced craftsmen to carry out extremely detailed projects. Some epoxy is a 1:1 ratio of hardener and resin, making it easy to mix. Most entry-level epoxies are good for beginners because they’re easy to use and self-level.
When you want to create a project, think about colors – this mica powder kit has vibrant colors!
Conclusion
That’s all for today! Be sure to check out our other blog posts for more information on resin molds and DIY epoxy resin projects.
How do you cast resin for beginners?
There are a few things you will need to get started with casting resin:
- A mold
- A resin kit
- A mixing container
- A stir stick
- Safety gear (goggles, gloves, and a mask)
- A well-ventilated area
There are a few things you need to know before starting to cast resin: the type of resin you will be using, the proper safety gear, and the correct way to mix and pour your resin.
There are many different types of resin available, each with its own properties and curing times. Make sure you read the instructions for your particular resin before beginning your project.
Resin can cause skin irritation and is harmful if inhaled. Make sure you are familiar with the health and safety hazards associated with working with resin before starting your project.
Be especially careful not to spill any epoxy on yourself or other surfaces, as it can be difficult to clean up. Pour your epoxy slowly into one corner of your mold until it has filled all the details; then tap the mold gently on a hard surface to release any air bubbles. Allow your epoxy plenty of time to cure before removing it from the mold
What do I need to make resin molds?
In order to make resin molds, you will need:
- Resin
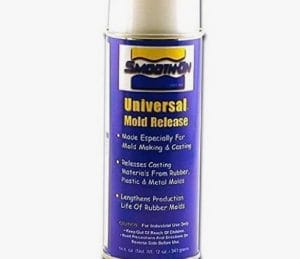
- Mold release
- A mold
- A disposable container
- A stirring stick
- A measuring cup
- A baking pan
In order to make resin molds, you'll need some basic supplies. Here's a list of what you'll need:
-Toxicologist - to test if ArtResin is a clean system
-A coat of ArtResin to protect your artwork
-Gloves
-A smock or an apron to protect your clothes
-Hair ties to keep your hair out of the resin
-Tape to catch drips and prevent them from accumulating on your workpiece
-A Pyramids painter's stand to help ensure your workpiece is horizontally level
-Warm water bath (half filled container) for mixing the resin
-Measuring jug with well marked lines for measuring the resin and hardener
-Plastic cup for mixing the resin
-Flat spreader to guide the resin as it's being spread
-Small butane torch like our Artist's Torch
Chemical strippers are useful if you don't have any other tools like a heat gun or hairdryer available to use on your flooring material.
How do I start a resin business?
Starting a resin business is a great way to get into the manufacturing industry. There are a few key steps that you need to take in order to get your business off the ground:
- Research the resin industry.
- Choose the right resin.
- Set up your manufacturing process.
- Market your resin.
resin businesses come in all shapes and sizes. There are a few key things you need to think about before starting your own resin business: what type of resin business do you want to create, what products or services will you offer, and where will your business be based?
Once you have answered these questions, it's time to start planning the logistics of your business. This includes setting up a workspace, buying the necessary tools and equipment, and recruiting employees (if necessary). You will also need to think about how you will market your business and find customers.
Creating a resin business can be a lot of work, but it can also be very rewarding. With careful planning and execution, you can create a successful resin business that meets your needs and exceeds your expectations.
What can be used for resin molds?
There are a few things that can be used for resin molds:
- Silicone: This is a popular option because it is durable, flexible, and easy to use.
- Rubber: This is a durable option, but it can be more difficult to use than silicone.
- Polyurethane: This is a strong and flexible material that is often used for industrial applications.
There are a few items that can be used as resin molds. You can use everyday objects like cups, bowls, and even toys. Certain items work better than others, so it is important to do some research before you start your project.
One of the great things about resin is that it can be used with a variety of materials. This gives you plenty of flexibility when it comes to creating your mold. In addition, you don't need any special equipment or the use of a stereolithography printer. All you need is some resin and an item to pour it into.
The finished result will be more of a painting than a three-dimensional object. However, keep in mind that the epoxy resin will heat up once it hardens and changes from a liquid to a solid. This means that you should avoid using thin plastic containers or ones made out of other flammable materials.
What resin products sell the most?
The answer will vary depending on the resin products
There are a variety of resin products available on the market, but some tend to sell more than others. Jewelry caddies, ashtrays, and molds are some of the most popular items made with resin. This is likely due to their versatility and ability to be used in a number of different applications.
In addition, beginner's kits are always popular among those new to working with resin. These kits come with a comprehensive introduction to the product as well as an extensive set of videos that show you how to use it. This makes it easy for beginners to get started and learn the basics before moving on to more complicated projects.
Finally, customer reviews can be helpful in determining what products people like the most. This company is one of the top sellers on Amazon in resin products, and their website has a very appealing color scheme and general layout that is designed specifically for beginners.
Does resin art sell well?
There is no definitive answer to this question since the art market is subjective. However, there are a few factors to consider when answering this question. Firstly, resin art is easy to produce and often sells for a low price point. This makes it an attractive option for buyers who are looking for an affordable piece of art. Additionally, because the possibilities are endless with resin art, buyers may be more likely to purchase a piece that catches their eye. Lastly, as the popularity of resin art grows, it's likely that the demand for these pieces will also increase.
What can you put in resin molds?
Resin molds can be used to create a variety of different objects. Some popular items that can be created with resin molds include:
- Jewelry
- Keychains
- Ornaments
- Decorative figurines
- Bottle openers
- Desk accessories
You can put just about anything in a resin mold! While the most popular items to reproduce are jewelry and figurines, you can also cast smaller objects like screws, washers, or coins. If you're feeling really adventurous, you could even try casting larger objects like a bike pedal or a small toy.
The sky's the limit when it comes to what you can put in a resin mold. The most popular items to reproduce are jewelry and figurines, but you can also cast smaller objects like screws, washers, or coins. If you're feeling really adventurous, you could even try casting larger objects like a bike pedal or a small toy. As long as it fits inside the silicone rubber mold box and isn't too big for your mixing container, it'll work!
Other Products To Consider